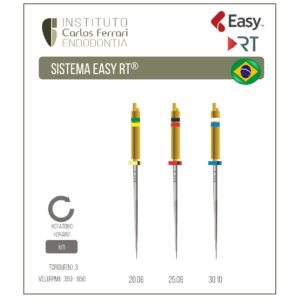

Descrição básica do sistema Dentsply Trunatomy sugerido para os alunos em nossos cursos, parte do guia para os principais sistemas disponíveis no Brasil.
Os instrumentos Trunatomy são conservadores e ideais para opreparo de dentes curvos, com grande comprimento e atrésicos.
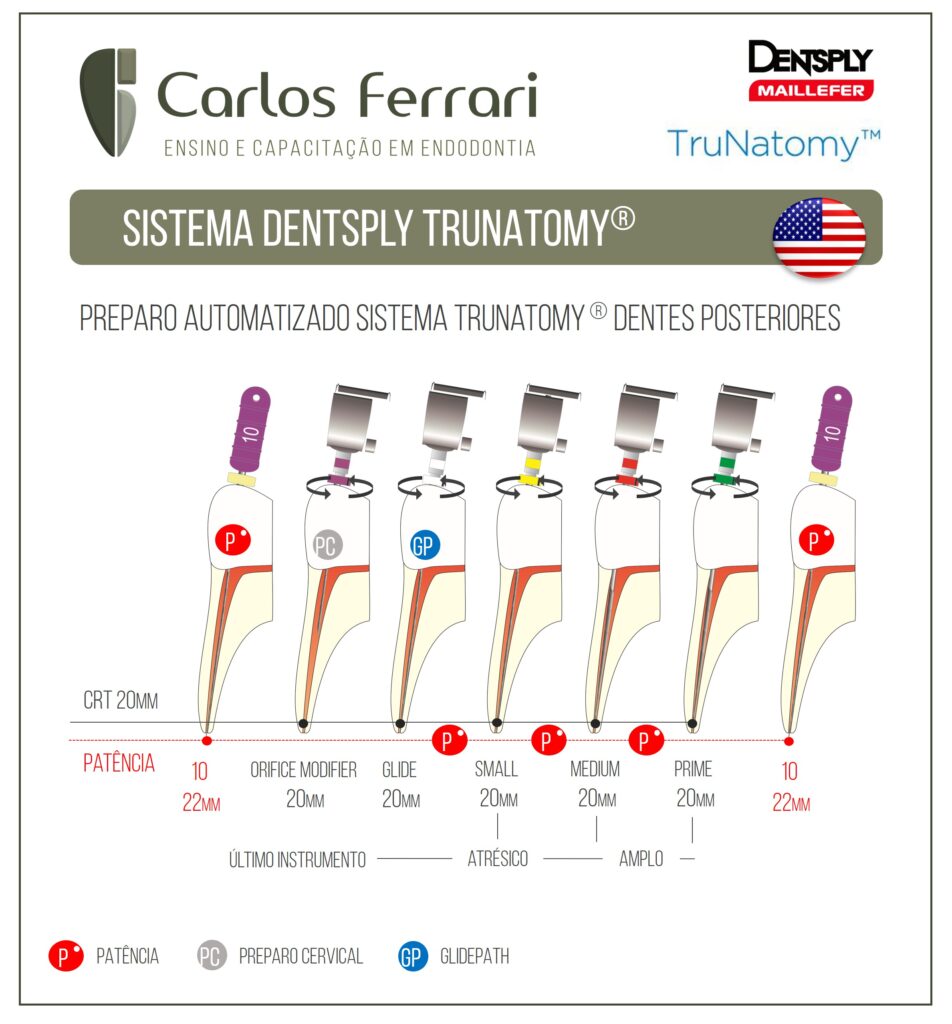
Descrição da técnica Trunatomy, segundo o fabricante:
1) Estime o comprimento de trabalho usando radiografias pré-operatórias com boa angulação de acordo com o
item 6.1.
2) Prepare uma cavidade de acesso conservadora, suficiente para revelar todos os orifícios do canal radicular.
3) Explore os 2/3 coronais dos canais com uma lima K nº 010 na presença de lubrificante como GLYDE™ FILE
PREP e irrigue.
4) Seguido por um TruNatomy™ Orifice Modifier a 500 rpm e 1,50 Ncm.
Com irrigante no canal avance o TruNatomy™ Orifice Modifier em 2-3 amplitudes suaves aproximadamente
2-5 mm para dentro e para fora do canal. Repita até que o terço coronário esteja instrumentado. O instrumento tem 7 mm de espiras de corte que não devem ultrapassar o orifício do canal. Irrigue o canal e limpe as
espiras de corte periodicamente.
5) Explore todo o canal radicular com uma lima K nº 010, determine o comprimento de trabalho (WL) usando um
localizador apical eletrônico (EAL) em combinação com radiografias, irrigue e confirme a patência.
6) Com irrigante no canal, crie e confirme uma via de permeabilidade reproduzível usando uma TruNatomy™
Glider em 2-3 amplitudes suaves aproximadamente 2-5 mm. Irrigue e repita até que o WL confirmado anteriormente com um EAL tenha sido alcançado.
7) SEMPRE comece a instrumentação com a lima TruNatomy™ PRIME (500 rpm / 1,5 Ncm) passivamente na
presença de hipoclorito de sódio com não mais do que 2-3 amplitudes suaves aproximadamente 2-5 mm para
dentro e para fora do canal. Irrigue e repita conforme necessário para o WL.
Ao atingir o comprimento, retire a lima para evitar o alargamento excessivo do forame apical.
8) Irrigue periodicamente o canal e limpe os detritos das espiras de corte das limas na remoção.
9) Se a lima TruNatomy™ PRIME não avançar facilmente, remova, irrigue e recapitule com uma lima K nº 010
para confirmar a patência do canal e mude para a lima TruNatomy™ SMALL.
10) Inspecione as espiras de corte periodicamente na remoção quanto à presença de desenrolamento ou endireitamento. Se for observada deformação, descarte e use uma nova lima TruNatomy™.
11) Avance a lima TruNatomy™ SMALL passivamente na presença de hipoclorito de sódio com não mais do que
2-3 amplitudes suaves aproximadamente 2-5 mm para dentro e para fora e remova a lima. Irrigue e repita
conforme necessário até o WL em um movimento suave/passivo para dentro e para fora (conforme descrito
acima) e depois use a lima TruNatomy™ PRIME até o comprimento de trabalho para otimizar a instrumentação*.
Ao atingir o comprimento, retire a lima, para evitar o alargamento excessivo do forame apical.
12) Quando a instrumentação estiver confirmada, execute os protocolos de desinfecção 3-D.
13) Use cones de papel TruNatomy™ específicos para secar os canais radiculares e cones guta-percha Conform Fit™ TruNatomy™ para obturar.
- Se a lima TruNatomy™ PRIME se apresentar folgada no comprimento, sem detritos dentinários nas espiras
apicais, continue a instrumentação com a lima TruNatomy™ MEDIUM.
https://ferrariendodontia.com.br/novo-instrumento-endodontico/